


Been awhile but I am proud to say that phase 1 of the wine cellar is officially finished for the year. The floor is painted and ‘shellacked’ as Buppa would say… which was a garage floor type sealer.
I am very happy and proud of our results, which I will recap here in this post.
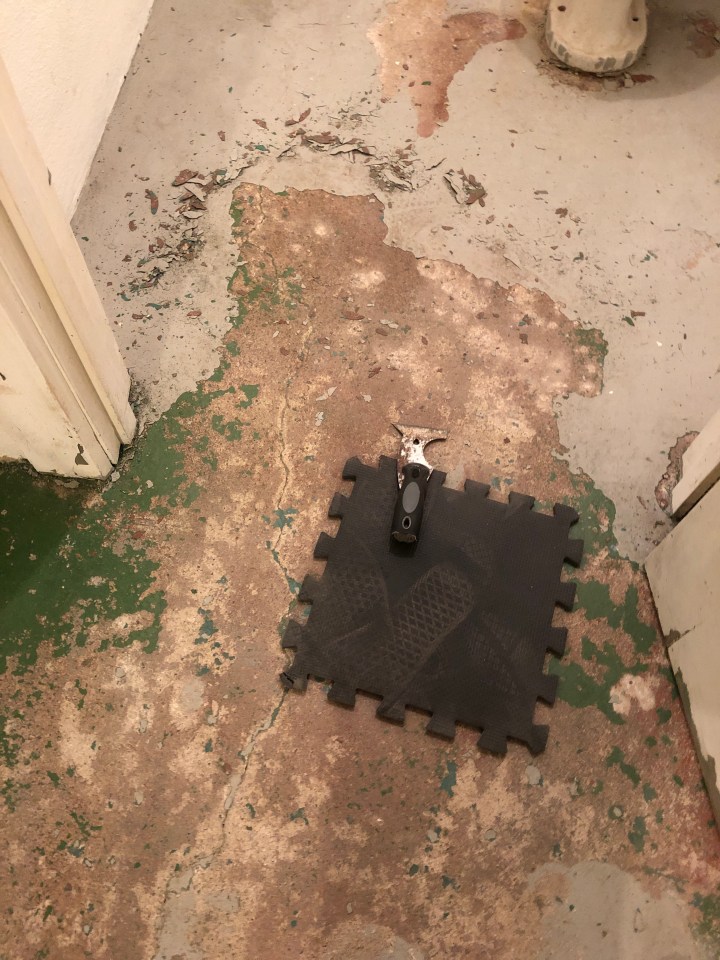
We began in December 2019 – scraping the floor a few hours/week. Had to take a break over the holidays, and then we were back at it in January. We used typical metal blade scrapers, or they have these ‘all in one’ tools that are handy too. You can not only scrape but when things get tough you can use the flat side and ‘tap’ or really beat the hell out of the paint to chip it up and then scrape again…
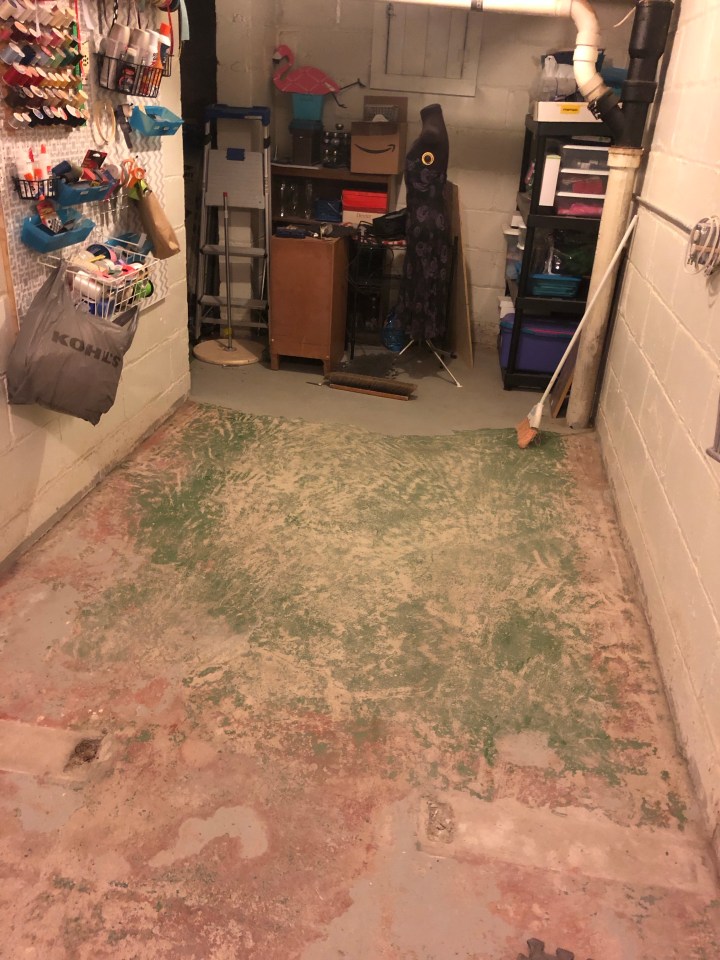
February we pressure washed the floor, there is a drain in the next room that we, as a team- one pressure washing the other sweeping, were able to direct the water to. Then we scraped again, and swept… we were ready to roll to painting. I admit I tried the pressure washing part by myself buying some rubber garage door barrier stuff as a spill blocker to dike for the water, but they were way to expensive on amazon so I tried the garage door seal strip.. but it didn’t work. I forgot how much the water splatters everywhere … from the PRESSURE part of pressure washing… the stairs were covered in little paint chips I had to sweep up after they dried. Once pressure washed we put the dehumidifier on at full blast and a big box fan on. Thankfully in winter the air in the house is so dry, that the water evaporated very quickly, quicker than I thought. I was hoping for a few day break!
The fake hubby convinced me we were ready for paint, too early, as I found out he wanted an excuse to go to Indeed Brewing for a beer release… but we picked out our paints from Sherwin Williams and bout what we needed for the ‘little’ wine cellar none-the-less.
Of course my timing… it wasn’t until AFTER we placed the paint order and were enjoying a refreshingly good beer that I mentioned… the EXPANSION. Yea, I swore I mentioned it before, but seeing as I daydream when I walk and occasionally talk to myself.. .who knows whom I told. The expansion meant tearing down the wall that separated the landing from my craft storage room. It is too cold in winter in the basement so I called it the storage room those days because I would bring anything up to the dining room and take over the table for the weekend if I wanted to do anything. And there is room in the laundry room for my craft storage…
We thus didn’t even buy HALF the paint we needed that day… and since it was those little cute quarts – way more expensive than just getting a gallon… Live and learn. Take my advice – discuss ALL the angles before paint… and there is NEVER an excuse needed for good beer.


The wall was gone before I really even knew it… however the dust that went EVERYWHERE was hard to not see…for weeks…. My fake hubby decided to cut a few corners seeing as there were only doorways to the workout room and laundry room – never expected the dust to get that far, thus didn’t put up dust barriers… again…live and learn.
We rushed to scrape that floor and put in a lot of time that next week and weekend. And had to again pressure wash… you know the drill. It is now end of February, no clue how it went by that fast, that is why we rushed and from here on out we put in a least 4 hours each on weekends to getting this done. Spring was around the corner and that meant we would move to outdoorsy projects and fun.


We did the solid wall color and the ceiling, and the following Friday I took off to learn how to paint the bricks. Seeing as it can take me a few hours to get going and know what I want I thought this was best before the weekend when we would hit it hard. I bought mop sponge head replacements – three of them – from Amazon and those were my templates as they were longer and luck had it, could just fit two of them in one of the concrete blocks so I could use their ‘grout’ line as ‘mine’ for the added texture. One we cut in half and you’ll see why in the pictures… had to have them staggered to look more real while maintaining those grout lines. We also had to slice a little off the top of the full size sponge so it was a little skinnier to better fit. I used a scissors, later in life the fake hubby used his utility knife we took off hardly a quarter inch of the sponge to make them skinnier top to bottom.
The issue I had as I begun was that the sponge didn’t take as much SOLID paint as I would like, definitely could see it was sponge…with all the holes of no paint and indentation looking… so after the sponge was pressed to the wall, I had to go back with a foam brush (hubby used a paint brush, but my lines aren’t as good so I used foam) to fill them in.
I also started mixing some darker colors in, HATED that, looked too washed out so after an HOURS worth of work to have enough of them done, I had to go back and paint over them, wasting another hour… I could NOT believe how long this part took us. Crazy insane. But I am a perfectionist.. and OH MY GOD is that not a straight edge… here hunny let me touch that one up for you. Yea, I really slowed him down once we got going that Saturday and Sunday.
IT TOOK US SIX WEEKS, yes I said 6 weeks!! To get these damn bricks done! But we did take a day off for Buppa’s 96th birthday and we took a whole weekend off and it wasn’t like we were painting daily or even 8 hours a day both days on a weekend. But still, never thought it would even take HALF that amount of time. If I had to guess I would say it took 80 hours total (both of us combined) to get these bricks done… the walls and the stairwell leading up. had we just worked at it a solid week and didn’t have all the cleaning of brushes and… probably would have been one week of work, 70 hours maybe, 35 hours each for us.
Reminder, we still have the floor left at this point and the trim, and it’s almost mid April.
Thankfully the trim we did in like a day. I apologize I didn’t blog that, or really ANYTHING since April, but pictures were out on Instagram and Facebook if you were following along, so was the finished product because I just couldn’t wait to share it all!!! The solid floor was also done in a weekend. Took like an hour to paint, then let dry over night and did a second coat.
The wall colors, I used Craftsman Brown for the wall solid that would then just be the ‘grout’ lines & Crescent for the wall brick we sponged on.
The floor was Canoe as the floor stone & Pueblo was the floor solid that again would end up as grout lines.
The trim was the darkest color to look like those old dark ceiling beams you see so often in older structures or cabins and such. We used it to paint some of the pipes as well as the little arch wall. That color was Burnished Brandy.
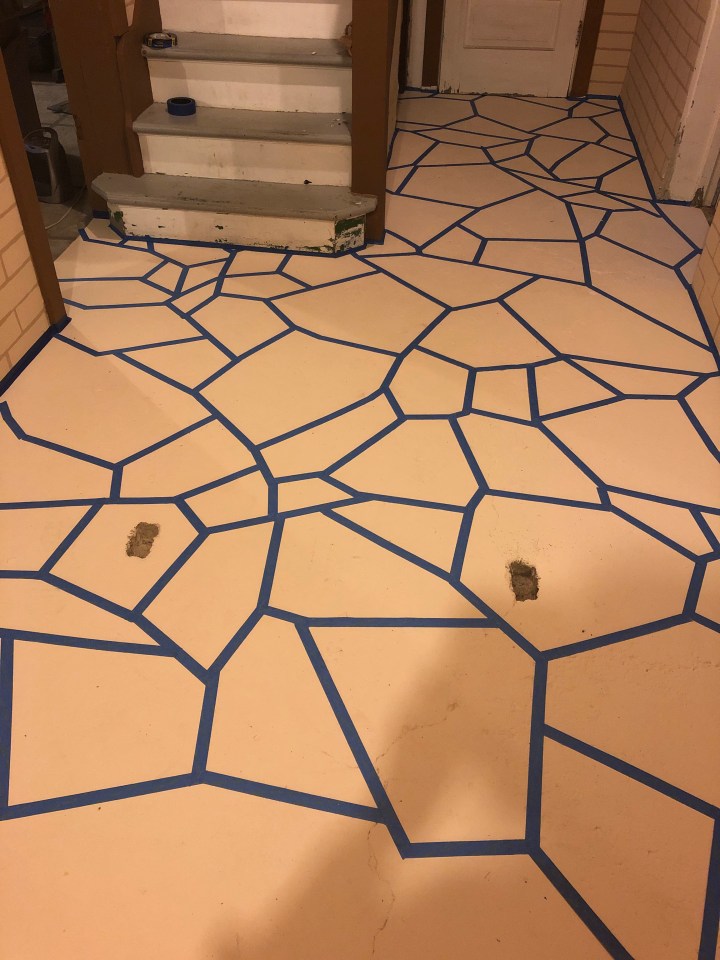
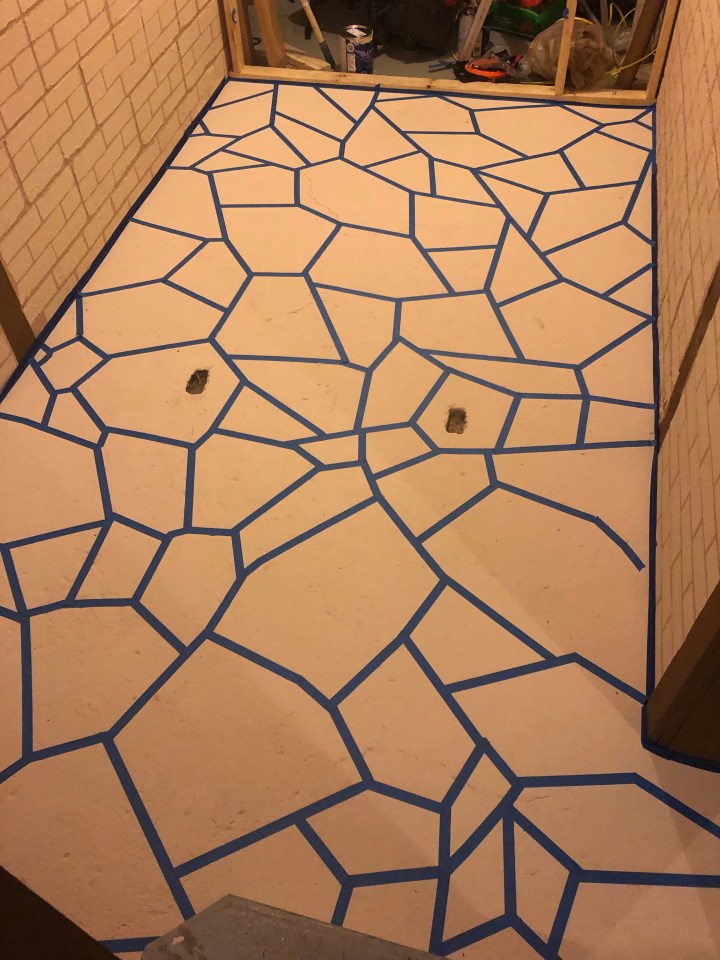
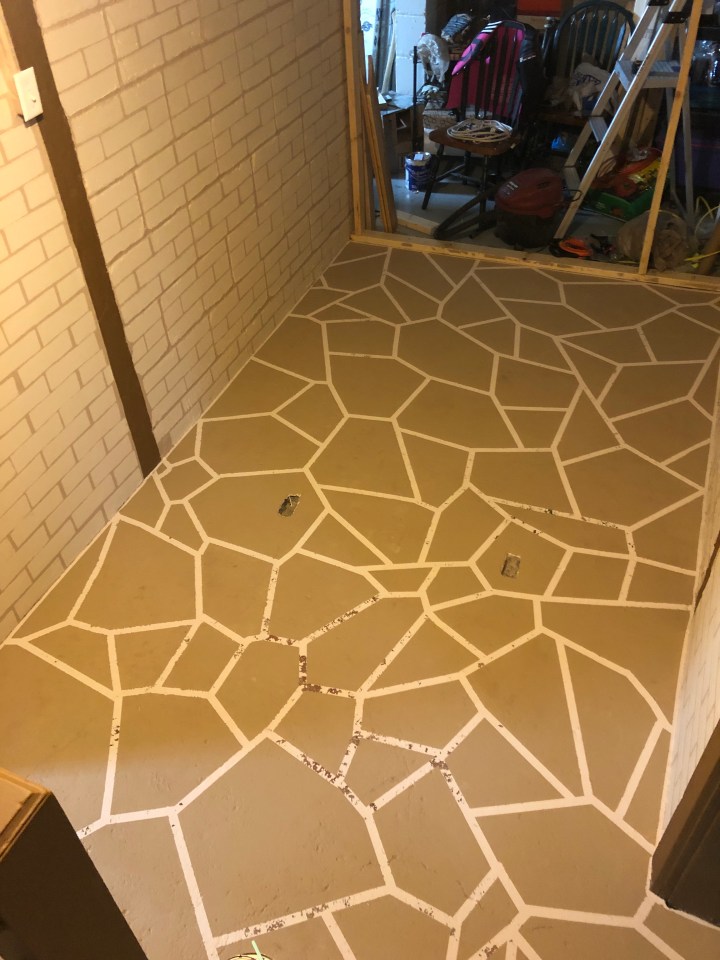
The fun part was taping the floor, I had some fun with that. I decided to just use painters tape and roll with it vs purchasing a cement pattern like so many other examples had used. I started in the corner by the bathroom since that would be seen ‘last’ as walking down the stairs and that pattern and I just clicked. I really like how it turned out, even with the blue tape it looked kinda cool hey?! This also made it super easy to then do the next part as we just plunk the solid color on top. I did have on me the other left over colors and TWO roller brushers so that the Canoe color wouldn’t get mixed in. I didn’t use a lot, but just a little bit of other color splattered on and rolled out to give the stones an ever slightly different shade thru-out. BE CAREFUL taking the tape off ☹ ours sadly took some of the paint off and I had to sit there with a little paint brush and redo a few spots. Not sure why this happened, we let the floor dry long enough before putting down the tape. Best guess from the fake hubby is that we left the tape there for a little over a week. We should have just taped it Friday, painted it Saturday, and removed the tape Sunday… bing bang boom. Needless to say I purchased, and thank Amazon for one day shipping, some hobby paintbrushes, kinda the childrens’ style but a quarter inch wide brush. Not the typical paint by number water color style brush. For one day shipping I had to buy, more than I needed (a pack of 50), but it was only like 2 or 3 bucks more than a smaller pack and beat the shipping… so if anyone needs some paint brushes… you know who to ask, I may have a few to spare, haha. you can just see the grout lines below. Sad sad.
Then… we had to ‘seal’ the floor. We did this to protect the hard work of the painting design. We used a clear coat thingy from Sherwin Williams to paint on the top, which I believe is for sealing garage floors. I was busy on a zoom meeting, and since it had to be done ‘quick’ I guess… Mr. Fake Hubby ran down and completed it himself. OMG. Did it stink. Completely and utterly OMG. As soon as the basement door opened… wow. We would be like high in an hour down there! I was not happy. I was REALLY not happy. So he went downstairs and took out the dryer vent window and …. I was still NOT happy. I bet him the can said something about VENTILATION, he didn’t take that bet… but he didn’t read the can before he painted. Slight bickering women (ok I was more than just a slight…) gave him a hard time about no ventilation as well as not realizing the stench while he was opening/painting… He never thought it would be THAT bad and linger so long that it would fill the entire house! But it made its way filling up the first floor, and floated up throughout the 2nd floor of the house… even with doors closed I felt I could smell it, but then you’d open the door and HOLY MOLY. He got up in the middle of the night for an hour to open the two patio doors on the first floor to flush out the air, which I am very very grateful for, but wouldn’t and still won’t admit that to him since this was his ooopsies and I was pretty angry about it all week. He’ll have to read this post to know –Hunny, I am very thankful and happy you did that. I was a little afraid we’d all wake up with headaches, nausea, or be high as kite! Let alone… like brain dead.
Alas the walls – complete, the floors thank god complete, stenchy stuff and all – done! the trim- done… I finally moved the wine rack we had into the room and the hutch (actually a week and a half ago already). The hutch will STAY, but the wine rack –prolly not. The fake hubby will cut a custom wine rack for the opposite wall. It will have ‘boxes’ with an X in the middle, I am sure ya’ll have seen those at restaurants or the fancier wine shops. Each portion of the X would hold say 6 bottles (3, 2, 1 in a pyramid) this each ‘box’ would hold 24 bottles… I think three or 4 of those on the bottom, then a few rows similar to the existing wine rack where they have individually grooves for its butt and bottle neck. One of these was already started. We went to Mom’s and G&G’s and Buppa and the fake hubby measured and started one row. I will need to stain them once cut and then the fun assembly and affixing to the wall for full support! I can’t wait, but until then, I am happy with what I have. One of these rainy weekend days we’ll work on the wine racks, until then its way to much fun to be outside.

#JustRUNt loves her JustAGreatWineCellar.
